Preparing Skin for Peel off Mask

With the immense increment in popularity of black peel off mask, we can understand that facial treatments have come a long way, and a good peel performed by an experienced therapist can leave your skin glowing.

Here’s how to prepare for and get the most from your first facial peel.

1. Do Your Research

There are some gentle peels that you can use at home, but if you want something more intense to get it done with an experienced skincare therapist or dermatologist.

2. Not For Everyone

When you get older your cell turnover slows down, so it takes longer for the skin to regenerate. When you regenerate new skin, your skin looks healthier. Even women in their 20s can get an accumulation of cells on the surface of the skin which dull and muddies the complexion. You shouldn’t have peels if you are undergoing laser treatment, have active infections, an open wounded or a history of drugs with photosensitizing potential.

3. Be Careful With Products

A chemical peel removes the tougher external layer of skin revealing a more delicate skin below. It’s therefore important that you choose your at-home products, both before and after your peel with care. Don’t use any exfoliating products or products containing retinoids in the week leading up to the peel or for a few weeks afterwards as they will further the irritation and potential damage to the skin.

4. Stay Sun Safe

After a peel, your skin will be more sensitive, particularly to UV exposure. If you want to avoid hyperpigmentation after a peel you have to avoid sun exposure as much as possible while the skin heals and be vigilant with sunscreen.

5. Know Your Skin Type

When it comes to facial peels you need to ensure that you choose a peel that is going provide the outcome you want and that it also works for your skin type. Certain ingredients work best for treating acne, others work to minimise sun damage and fine lines. Sensitive skin will also require a more gentle peel than other skin types.


Honey-Cinnamon Face Mask

Natural acne remedies are a good way to get rid of it, or at least hold it at bay. They make you step back and really figure out what’s going on with your skin, and how to work with it. Chances are, your skin will repay you in kind for not simply ravaging it with strange chemicals-and your wallet will probably thank you too.

honey-cinnamon

Honey is sticky, and cinnamon is spicy, and it seems like they’re both things you’d want to avoid getting near your skin. Surprisingly, while it may sound strange, honey and cinnamon make an awesome combo when it comes to acne. Cinnamon has anti-micro bacterial properties so it can help stop bacteria from getting out of hand. If it does, the honey is also a natural antibiotic, ready and waiting to wipe the little buggers out.

Requirements for a honey-cinnamon face mask for getting rid of pimples and acne:
-2 tablespoons of honey
-A pinch of cinnamon
– paper towels

Directions
Rinse your face with water and pat dry. Mix 2 tablespoons of honey and a pinch of cinnamon together until they are thoroughly blended and have formed a sort of paste. Apply the mask to your face (or spot treat) and leave on for 10-15 minutes. Rinse off completely, and pat your face dry. This is a sticky mixture, so make sure you have some paper towels at on hand.

Haircuts for Round Face

If you have a circular face, it will be about as wide as it is long. This may vary a little where your face is not quite as wide as it is long, but it’s usually pretty close.

You will have fullness at and below your cheekbones. People with round faces also tend to have wide hairlines, less-pronounced chins, and their necks often seem short.

Below are the most common face shapes besides round. Most people will fit into one of the major categories, which also include:

  • Oval Face – Length equal to one and a half times width.
  • Long – Longer than it is wide.
  • Heart – Narrow at jaw-line, wide at forehead and cheekbones.
  • Square – Forehead, jawline, and cheekbones are almost equal in width.
  • Diamond – Wide cheeks, narrow forehead and jaw line.

There really is no one “perfect” hairstyle for a round-shaped face; many things factor into the total equation. For example, the length of your hair, its texture, and weight, your age and lifestyle requirements all play a part in what is ultimately the best.

There are good general guidelines that you can follow, but the best solution is to find a style that works best for you and all your beauty needs.

If your face is round, the best hairstyles generally include:

  1. Layered bangs rather than straight or heavy bangs.
  2. Short styles which give height.
  3. Styles that add length.
  4. Styles that keep the sides of your hair short or close to the face.
  5. Curls around the crown  (but never near the cheeks) to create height.
  6. Keep the sides of your hair short with a curly style.
  7. Longer to very long styles, with bangs and a graduated shag or layers, so that the face and the neck are given a slenderizing shape.

Aloe Vera for Long and Shiny Hair

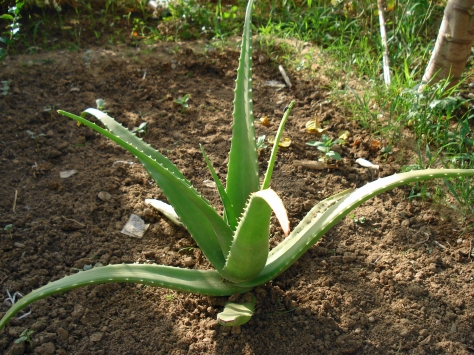
Aloe Vera and its application can work wonders for our hair and skin as it contains high amounts of proteins. It helps promote hair growth, while also helping stop to hair fall completely.

Aloe_vera_plant

Most of our hair problems can be cured by one Aloe Vera plant in a small pot that we can grow in our house.

Aloe Vera cleanses, nourishes, moisturizes, and protects our hair from damage and roughness while making it shine with a healthy glow.

Additionally, it provides all the nourishments, helps us get rid of dandruff, promotes hair growth, prevents hair loss, while also preventing excessive oiliness.

Benefits of Aloe Vera:

  • It protects hair from dust, pollution, and other impurities.
  • It controls the production of sebum in your scalp. If sebum is left unchecked, it causes the scalp to become oily, which clogs the pores and hair follicles, thus preventing new hair from growing.
  • It promotes hair growth by improving blood circulation.
  • It also helps provide better nutrition to your scalp, by helping improve the function of hair follicles.
  • It contains plenty of essential vitamins and minerals that nourish and moisturize your scalp.
  • It contains vitamin A, E, and B-vitamins that help strengthen your hair.

Snake Braid

If you have already mastered the art of three strand braiding technique, the snake braid is yet another great way to change your braided look this season also, it is extremely easy.

snakebraid

The Snake Braid Tutorial in 10 simple steps:

  1. Create a large diagonal forward section of hair behind your ear.
  2. Split the section into three equal subsections.
  3. Apply a bit of water to your hand and smooth out each section. This will help make a smooth, clean braid.
  4. Begin braiding a basic, three-strand braid in this section, we do not want this braid to be too tight or too loose.
  5. Braid almost all the way down to the ends of your hair, leaving just one to two inches of hair below where you stop the braid.
  6. Take two of the sections and combine them to make one larger section.
  7. Take the smaller section and carefully slide it up the braid.
  8. Keep sliding the smaller section up to the top of the braid.
  9. Now slide the section back down to create a looser “s” pattern braid.
  10. Wrap the snake braid around the back of your head and pin in place. Spray with a medium hold hairspray to add extra hold and tame any stray hair.

Tip: Lift a small section of hair up and pin your snake braid below it. Drop the hair down so that it conceals where you pinned the braid in place.

Olive Oil for Skin Care

Factors like pollution, food habits, harmful rays, radiation, allergies, alcohol, pimples, stress, and aging causes the change in the looks of our natural skin making it pigmented and dark.olive-oil-576533_960_720

A natural organic product like Olive Oil comes in handy in making our skin more lighter, flawless and younger looking.

Olive oil is mono-unsaturated oil drawn out of a small oval-shaped bitter fruit known as olive found in the Mediterranean areas and for many centuries was most popularly used for cooking and health benefits.

However, as time went by olive oil has come to be a very popular skin and hair natural wonder used by most skin and hair care products around the globe.

Olive oil has some reported benefits to the skin. According to the International Olive Council, olive oil is rich in vitamins, including A, D, and K, as well as vitamin E.

It also has antioxidant properties so it might help prevent or reverse damage from cancer-causing ultraviolet radiation. It has a very high concentration of an ingredient called squalene as compared to the other types of fats and oils that humans normally eat. The squalene is what gives olive oil the extra antioxidant boost.

It even moisturizes and fights bacteria protecting your skin from acne and pimples.

Water Marble Technique

Nails have become an intricate part of the girls’ everyday look. In this blog, I’ll be introducing you girls with the water marble nail painting technique. In order to paint your nails with beautiful mosaic patterns follow the steps below:

  1. Prepare the Materials:. You’ll need a small bowl of water, a light-colored base polish, various other colors of polish, a toothpick, tape, q-tips and a polish remover.
  2. Choose Your Colors: You can either do a variety of colors for a rainbow-like look or choose variations of the same tone, making for a more ombre-inspired look.
  3. Create a Canvas: If you’re new to marbling, paint your nails a lighter shade to establish a good base and give something solid to which the polish can adhere. Make sure the color is totally dry before you continue.
  4. Tape Your Fingers: To prevent having to do a major cleanup after the marbling, cover the skin around each nail with tape.
  5. Drip Polish in the Water: Take your small bowl of water and add a drop of polish from the brush into it. Then, take another color and drop another droplet of that shade into the center of the other polish. Continue dropping polish into the bowl of water, shade by shade according to your preferences.
  6. Get to Designing:. Use your toothpick or q-tips to gently blend the colors together. Remember the key to a beautiful pattern is to swirl it gently.
  7. Dip It Good: Here’s where the actual marbling happens: Take each finger and dip it slightly into the water so each nail just hits the surface. You should see a pattern transfer onto your nail now you can lift your fingers from the bowl by giving it a  gentle twist.
  8. Remove Your Tape: After your nails are totally dry, gently lift off the tape. If you decided to skip the taping part, or some of the polish happened to seep through, clean up the residue around your finger with nail polish remover and a cotton swab.
  9. Top It Off: The most important step of any manicure is to put on that transparent top coat.

After this, girls you are ready to flaunt your nails.

Thank you for reading.

Four-Strands Braids

Four Strand Braids that look complicated and time-consuming are currently the girls’ favorite. Because it looks unbelievably complicated most of us hesitate to give it a shot. However, you are utterly wrong to think that four strand braids are super complex as it is just opposite of what it seems. If you have mastered the art of three strand braids, four strand is just as easy. Just follow the following steps and conquer the most attractive hairstyle technique.

fourstrand

Steps:

  1. Make a one-sided low ponytail.
  2. Grab a small chunk of hair from the ponytail.
  3. Do a regular three-strand braid on the small chunk of hair and tie it with a small elastic band.
  4. Divide the rest of the hair into three equal sections.
  5. Keep the three-strand braid that you braided earlier as the second strand or as the middle left strand. Now, you have four strands.
  6. Place the rightmost strand under the middle right strand.
  7. Then, place it over the braided strand. The braided strand should now be the third strand.
  8. Take the leftmost strand under the strand next to it.
  9. Then, place it under the braided strand. The braided strand should now be back as the second strand.
  10. Repeat the steps 6 and 7 and the braided strand will be the third strand.
  11. Repeat the steps 8 and 9 and the braided strand will be the second strand.
  12. Continue the braid with the same process until the end is reached.
  13. Tie the end with an elastic band.
  14. Simply pull each strands on the braid to make it more attractive.
  15. Voila! And you’re done. Now you are completely ready to flaunt your new hairstyle and dazzle your friends and colleague.


Thank you for reading! 😀

Easy Heatless Wavy Hair

If you’re one of the girls who love the beachy wavy hairstyles but are tired of having your hair grilled over and over again by curling barrels, then this article is for you.

To give your hair a nice textured wavy touch, the first thing you’d do is start with dampening your hair and then brush your hair to remove all the tangles. If the hair is damp the waves will last longer. Brushing your hair is a good natural way to improve the health and appearance of your hair for one thing, but also, if you brush any tangles off of your hair the night before, all you have to do the next morning is to unbraid your hair and then style it however you want. And if you brush it before braiding, you don’t have to worry about brushing any of the waviness out of your hair either.Summer_hair

Start with partitioning your hair into three equal halves and start braiding your hair. A key to having a subtle natural looking desired waviness lies in how loose is your braid. If the braid is too tight, you’ll end up with crimped hair rather than wavy hair. But if you prefer the crimped hair over the loose waves, you must tighten your braids.

After you’ve braided your hair, just give a gentle pull at each strand with your fingers to make sure that they’re nice and loose. You must try to braid the hair all the way as close to the end of your hair as possible, otherwise, you’ll end up with wavy hair and then a few inches of straight hair at the bottom.

Then you’ll leave your damp braided hair overnight and all you need to do in the morning is just unbraid your hair and run your fingers through it a bit, and get that wavy looks!

And you’re good to go.

Organic Medicines- Part II

honey-e1498709950757.jpgHoney has antiviral, antibacterial and antifungal properties and it is your best friend whenever you catch a cold. Home ingredients are also great for various cosmetic purposes. Honey is also a major kitchen ingredient. It is not only sweet but also has many properties to help the skin glow and soften. It gives shine and volume to the hair.

Lemons can work wonders for your skin and hair. Rubbing a slice of a lemon on a pimple/scars fades the scars and brings the natural glow of the skin back. If you apply lemon juice on your hair, it highlights the hair and gives it a glossy shine. The key is to apply it for a few weeks without missing a single day.

Tomatoes and potatoes, the two most frequently used kitchen ingredients help reduce sun tans and makes the skin glow. Tomatoes can also help soothe nasty burns. Aloe-Vera can also be used to help with the burns. Aloe-Vera also has antifungal and antibacterial properties and can be used to get rid of dandruff and itchy scalp. It also helps promote hair growth.

Coconut oil can be used to massage the human body, which helps relax our muscles and can also be applied to the tips of the hair to reduce split ends. If you have dry and damaged hair, coconut oil is your savior. Argan oil and castor oil also promotes hair growth. A drop of argan oil applied daily to the eyebrows helps thicken the brows and gives it that fullness we all so richly desire. Care has to be taken not to drop it in the eyes as that can be very harmful.

So as you can see there are numerous home ingredients that can be used as medicines. However, it is important that we find a good source on the internet for the home remedies. There are many sites where one can find fake home remedies. This could, in turn, be dangerous because the dosages of such home remedies are not supervised by professionals. Hence, if used with proper care and guidance, homemade medicines can prove to be more useful in our lives than the pharmaceutical medicines.